How to Automatically Setup Micro-Services Communication: Examples and Demo
How to Automatically Setup Micro-Services Communication: Examples and Demo
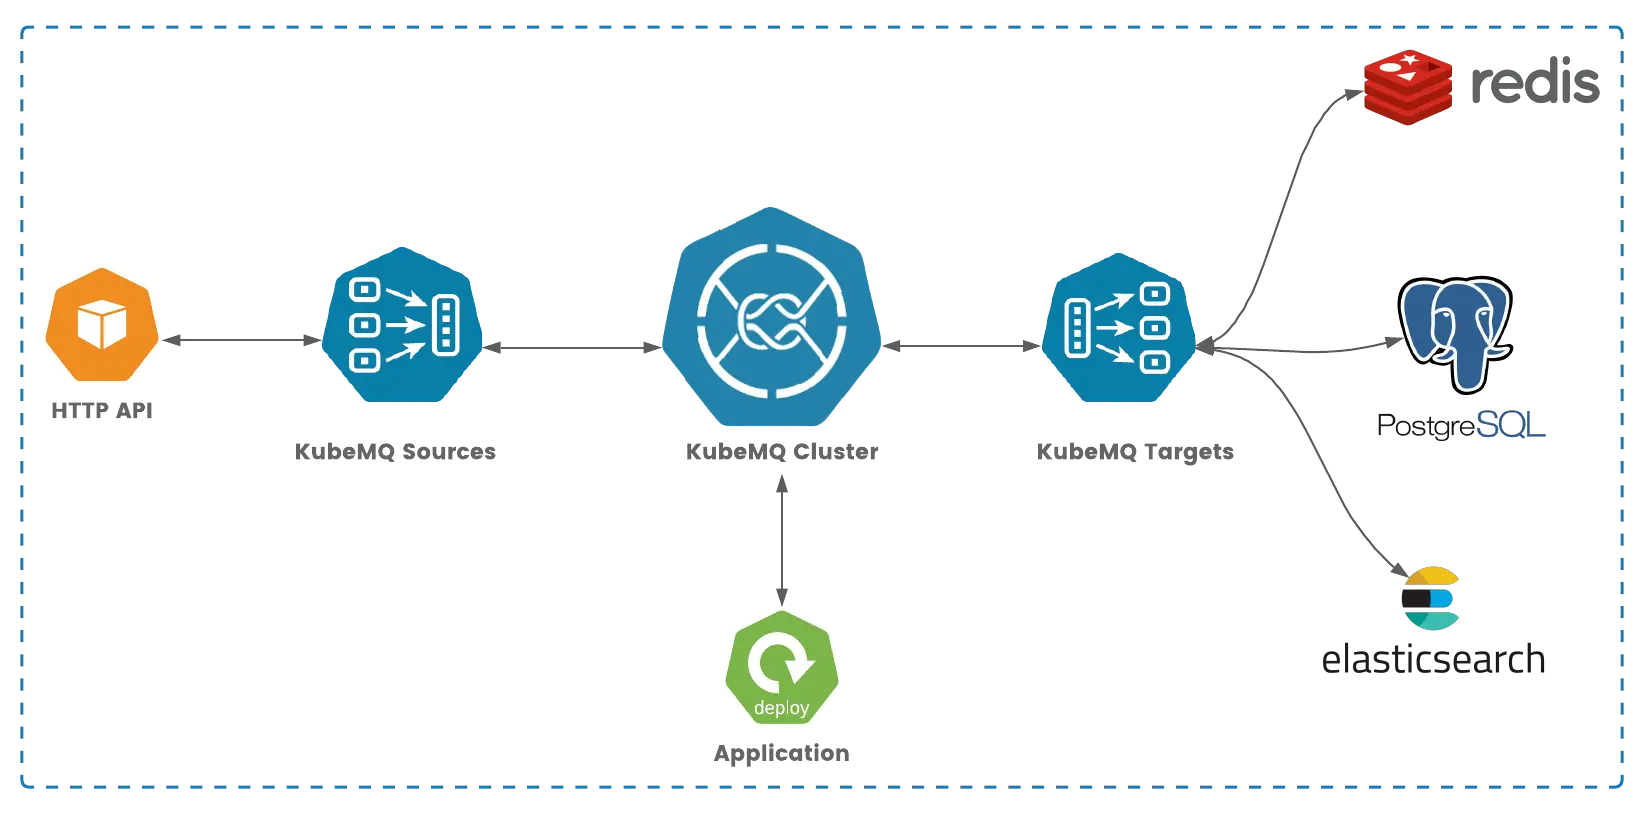
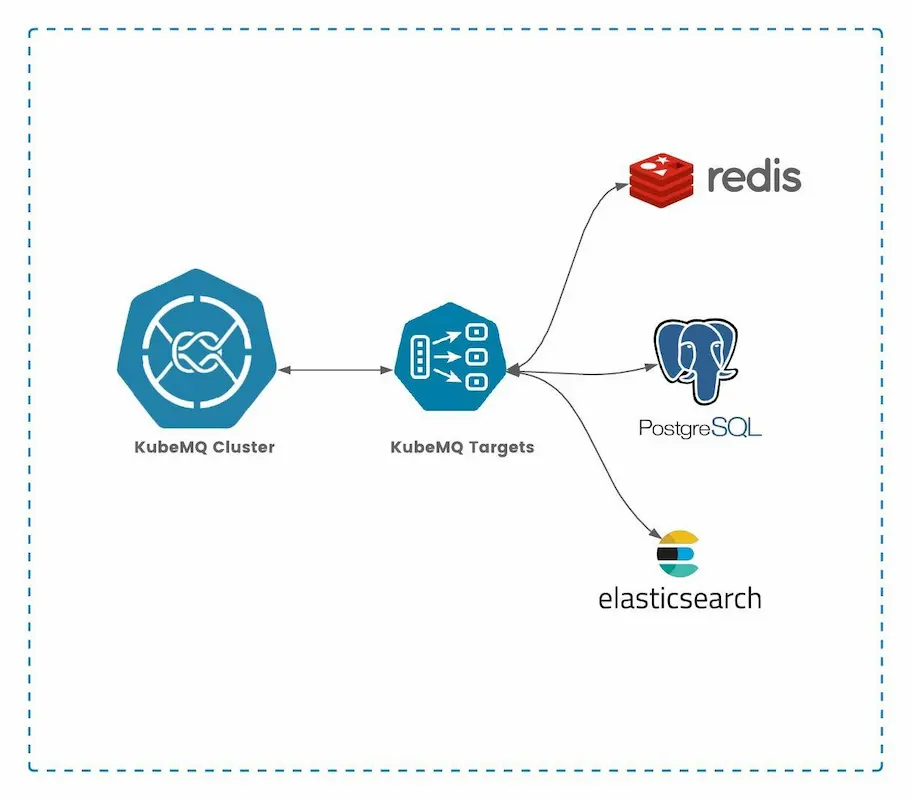
This tutorial shows how to connect microservices to each other automatically in minutes. We will demonstrate how KubeMQ Cluster can connect three essential services – Redis Cache, PostgreSQL Database, and Elastic Database with two other microservices applications – in just a few configuration settings and without spending time to write code.
To achieve this, KubeMQ Connectors are used to enable access for these two types of applications:
1. An application that sends and receives requests to the three services and gets back responses using the KubeMQ query pattern.
2. An application that uses KubeMQ as an API gateway to communicate via a REST call to the three services.
First thing’s first; using Kubernetes command-line tool (kubectl) CLI you need to check that all services are deployed and are working. Here’s how you do it.
–> On your main page, type “kubectl get pods –A”. You should see that PostgreSQL and Redis are running.
–> For Elastic, type “kubectl get sts – A." You should see that Elastic Search is indicated as “logging."
Deploying KubeMQ Cluster and Connectors to Kubernetes Cluster
The fastest way to deploy KubeMQ is by downloading it from KubeMQ quick start page. After deploying KubeMQ, use kubemqctl CLI tool to verify the following:
–> To check the readiness of your cluster, type “kubemqctl g c."
–> To check whether the connectors are running, type “kubemqctl g con”
Adding Integrations to the 3 Services
After deploying KubeMQ components, the next step is to add the integrations to the services. This will be done by using kubemqctl CLI automated building and management tools.
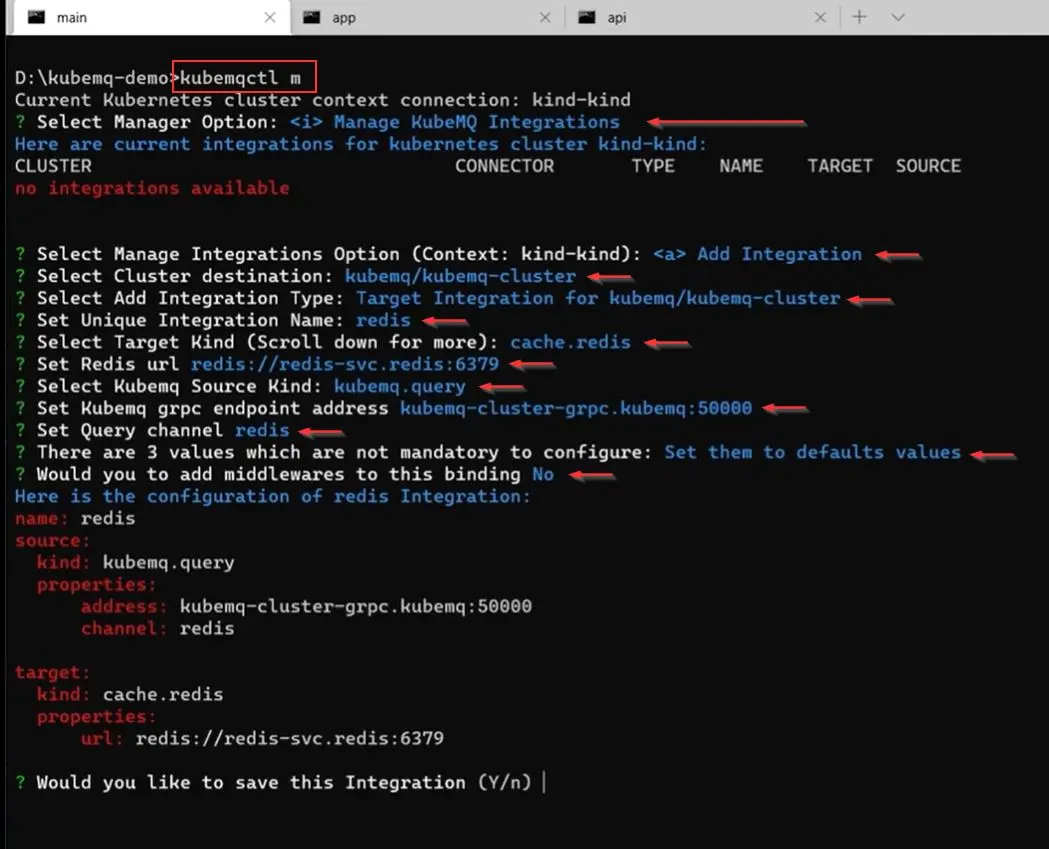
1. Type “kubemqctl m” execute and select your manager option as “Manage KubeMQ Integrations”
2. For the next steps, type or select the following options:
i. Manage Integrations Option: Add Integration
ii. Cluster Destination: kubemq/kubemq-cluster
iii. Add Integration Type: Target Integration for kubemq/kubemq-cluster
iv. Unique Integration Name: redis
v. Select Target Kind: cache.redis
vi. Redis url: redis://redis-svc.redis:6379
vii. KubeMQ Source Kind: kubemq.query (It means you will be able to send and receive data for redis)
viii. KubeMQ grpc endpoint address: kubemq-cluster-grpc.kubemq:50000
ix. Query Channel: redis
3. Proceed to set values to defaults but do not add middlewares to the binding when prompted. Save your Integration progress.
A notification acknowledging Redis Integration has been successfully added will appear.
Repeat the same procedure for both PostgreSQL and Elastic databases.
Testing the 3 Integrations With an Application
Once all the 3 integrations are using KubeMQ query for sending and receiving, next thing is to test the integrations with an application connected to KubeMQ. The application is designed to send and receive requests for the 3 integrations (Redis, PostgreSQL, and Elastic).
For Redis, the application performs the following requests:
1. Set – Sending Redis data with a random key
2. Get – Getting back the data
3. Delete – Deleting the key from Redis
For PostgreSQLs, the requests to be run are as follows:
1. Transaction – Several queries are running one after another, entering the data in rows into the table. If the table doesn’t exist, a new table will be created for the data to be added.
2. Query – Retrieve data from the table
For Elastic, the 6 requests to be run are as follows:
The first 3 requests are managing indexes:
1. Check Index existence – checking if the log index exists in the elastic database
2. Delete Index – if exist it will be deleted
3. Create Index – recreate the same log index
The next 3 requests are managing document for the elastic search
1. Set – Set and save the document to elastic
2. Get – Retrieve the document
3. Delete – Delete the document
To summarize our progress thus far, this application is simulating the request and response we can perform with the Redis Cache, PostgreSQL Database, and Elastic Database integrations.
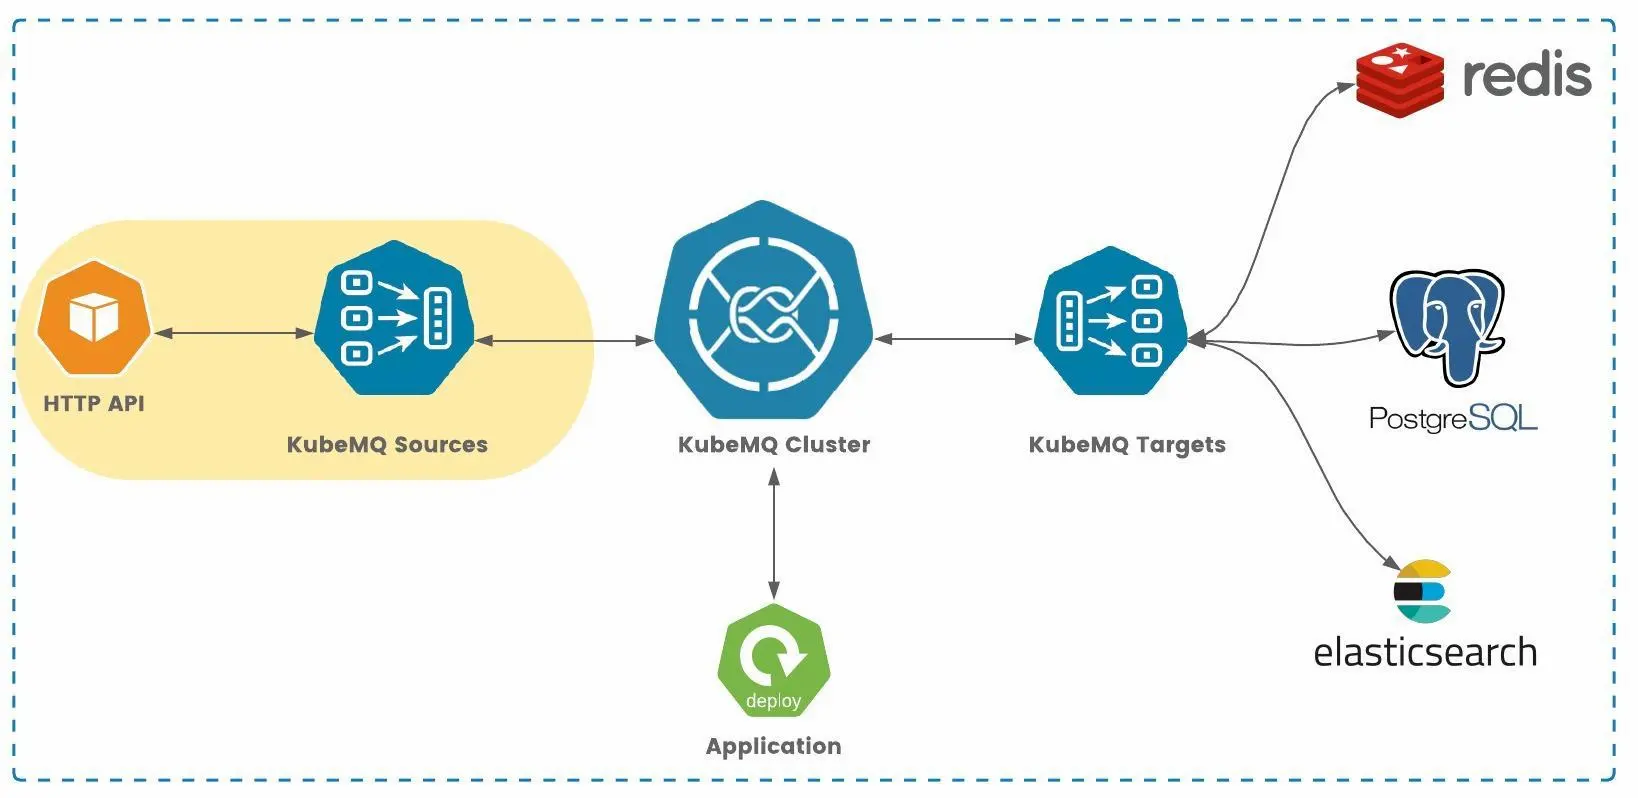
The next step is to add an HTTP source to allow other services to communicate with Redis, PostgreSQLs, and Elastic.
Adding A Source Integration
Use kubemqctl CLI:
1. Type “kubemqctl m” execute and select your manager option as “Manage KubeMQ Integrations”
2. Under “Integration Type”, select “Source Integration for kubemq/kubemq-cluster”.
3. Both unique integration name and source kind are “http”.
4. When prompted for supported methods, use the post method.
5. Use dynamic mapping for HTTP requests. This means that every request will forward to a specific channel in KubeMQ.
6. For the next steps, type or select the following options:
a. KubeMQ Target Kind: kubemq.querry
b. KubeMQ grpc endpoint address: kubemq-cluster-grpc.kubemq:50000
c. Channel Mapping Mode: Dynamic
7. Proceed to set values to defaults but do not add middlewares to the binding when prompted. Save your Integration progress.
The new integration is can now receive requests in port 8080 and send data to KubeMQ query Target.
Testing The HTTP Service Integration
To test the integration, a similar procedure to the application testing will be performed. The HTTP service communication with KubeMQ cluster will be established through the “Source” integration we have setup (that is listening to port 8080). From KubeMQ cluster the messages will be processed to the 3 integrations (Redis, PostgreSQL, and Elastic) the same as in the previous testing.
After running the HTTP API service, you can immediately tell that the requests were processed successfully; the same as described in the application testing section.
Conclusion
This tutorial shows how KubeMQ CLI tool is used to easily create and manage communication between microservices, with automatic network creation functionalities. Using the CLI tool, a basic microservices connected backend was setup in a few configurations commands saving major code work and time. A smooth integration is a click away for a long list of over 100 external services such as AWS, GCP, and Azure popular services; as well as independent DB, cache, messaging, and storage services supported by KubeMQ Sources and Targets connectors.


